- Posted using BlogPress from my iPhone
Showing posts with label patchwork. Show all posts
Saturday, 17 March 2012
Flying Geese Progress
Well I've made all my individual 'geese', now it's just a case of arranging them. I like the first idea below, but am trying other ideas before I start sewing.


- Posted using BlogPress from my iPhone
Thursday, 16 February 2012
Patchwork Cushion Covers
Finally completed three hand-pieced, patchwork cushion covers, coming to Etsy soon!

- Posted using BlogPress from my iPhone
Monday, 26 December 2011
Gee's Bend Quilts
I heard about these amazing quilts a while ago, but stumbled upon a recent post on Deb Rowden's quilt blog. I searched for some images and found these. So original, modern and colourful and all made using recycled fabrics. Gee's Bend is a small, African-American town in Alabama- for a more comprehensive history see this website.
Labels:
alabama,
exhibition,
gee's bend,
patchwork,
quilt,
recycled,
Thrift
Tuesday, 15 March 2011
Japan Tsunami Appeal
All proceeds to British Red Cross Japan Tsunami Appeal
Sunday, 6 March 2011
Log Cabin: big and small
Saturday, 12 February 2011
Finished Wash Symbol Cushion
Finished Star Pieced-Patchwork Cushion
Wednesday, 12 January 2011
Stars
I was really inspired by Garment House's star cushion and decided to make my own version using utilitarian/ repro feedsack prints. I love the juxtaposition of gingham, chambray and floral. This is a hand-pieced patchwork- so therapeutic after a chaotic day at school... Think I will eventually applique it onto white cotton/ linen to make a cushion cover.
Friday, 7 January 2011
Dresden Plates
I love this modern take on the Dresden Plate. I have loads of these made up ready to applique into a quilt, but cushions seem more appealing now! I really like the use of utilitarian fabrics.
Thursday, 6 January 2011
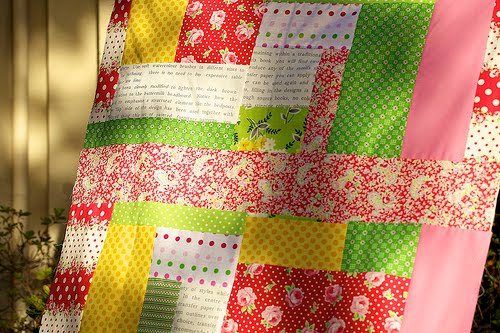
Sugar Pop Quilt
So I couldn't resist using this fabric immediately and set to work on another baby quilt. I have almost finished the top, but need to add the border. I just find it boring to sew rectangles together...
Tuesday, 28 December 2010
☺ Intercourse Purchases ☺
Tuesday, 30 November 2010
Sewing for Sanity
Sew (ha ha)... I've been very distracted recently by some major changes in my personal life. My concentration has been way off and I have often felt like I'm on another planet... that is until I started sewing again! Nothing too complicated; just some patchwork pieces that I will turn into mini quilts eventually. Sewing is so therapeutic and has really kept me sane these past few weeks.
Wednesday, 27 October 2010
Sawtooth Stars
I am addicted to the new Singer and have been nosing through my mum's fabric stash. She has some wonderful fabrics- the Moda Rawhide collection being one of them. I have spent this afternoon making some 6" sawtooth patchwork patches, which I think look fab! I really feel like a girl from another era using this machine!
Monday, 30 August 2010
How to adapt the Port Elizabeth pattern: Basic to Intermediate
I have finally got around to drawing some ideas out for adapting the very simple Port Elizabeth sewing pattern, available on BurdaStyle. I hope the diagrams are helpful; please contact me if you would like any help or want to know how to adapt the pattern another way.
One of the simplest ways of personalising this pattern is to alter the neck or hemline. You can change the neckline to a scoop, V or square shape; you could add a V-shape or shirt style hem. You could shape the neckline and finish the edge with visible bias binding or draft a facing (I can add a diagram if you are interested).

☞ Please remember this pattern has no seam allowance. You must adapt your pattern and then add seam allowance afterwards on every edge a seam will be ie side seams, shoulders, armholes, neckline, hemline and centre front if you have a seam here.
One of the simplest ways of personalising this pattern is to alter the neck or hemline. You can change the neckline to a scoop, V or square shape; you could add a V-shape or shirt style hem. You could shape the neckline and finish the edge with visible bias binding or draft a facing (I can add a diagram if you are interested).
A simple addition is a Patch pocket or an Apron style pocket, as below. Use the front pattern piece to draw a pocket pattern, as the diagram.


When you start to feel confident about pattern adaptation, you could start to cut the pattern into more panels and add a yoke. You will need to cut the bottom half of the bodice off and extend the bottom section as much as you would like it gathered into the top section. It is important to remember that 'what goes up, must come down' ie side seams and shoulder seams etc must be equal. On the diagram a=b and c=d.


Something simple to achieve that changes the look entirely, is to add a button stand. The centre front (or centre back) line becomes the central position for your buttons and buttonholes. Therefore, you need to add 1/2 inch either side of this (your button stand). You must then add a 1 inch facing and then add your seam allowance on every edge. This is simple to make: once cut, press along the seam allowance and facing lines and neatly tuck under. Stitch just under 1 inch from the edge on the right side to secure the layers together. Mark on buttonhole placement and add buttonholes and then buttons. Finish neckline with bias-binding.
Friday, 27 August 2010
Pennsylvania Purchases
✂ Fabric, Fabric, Fabric! Wow, what an amazing array of fabric shops in Pennsylvania! This is a selection of the purchases I made out there.
Sunday, 30 May 2010
When will I learn?
When will I learn not to take on 3 million new projects at any one time?! I couldn't resist this set of fabrics...
Subscribe to:
Posts (Atom)